If your shower drips constantly, refuses to maintain a steady temperature, or the handle turns without any change in temperature, the cartridge is probably to blame. This guide explains what a shower cartridge does and walks you through the replacement steps, so you know what to expect, whether you do it yourself or call our team.
Dealing with a dripping or inconsistent shower in Plano? Call DNA Plumbing Heating and Air at (214) 817-3755 or contact us online to request service and receive upfront pricing before any work begins.
What Is a Shower Cartridge?
A shower cartridge is the internal valve part that controls water flow and temperature inside your shower handle. When you turn the knob or lever, you’re moving the cartridge. It opens and closes ports inside the valve body to allow hot water, cold water, or a mix of both to pass through.
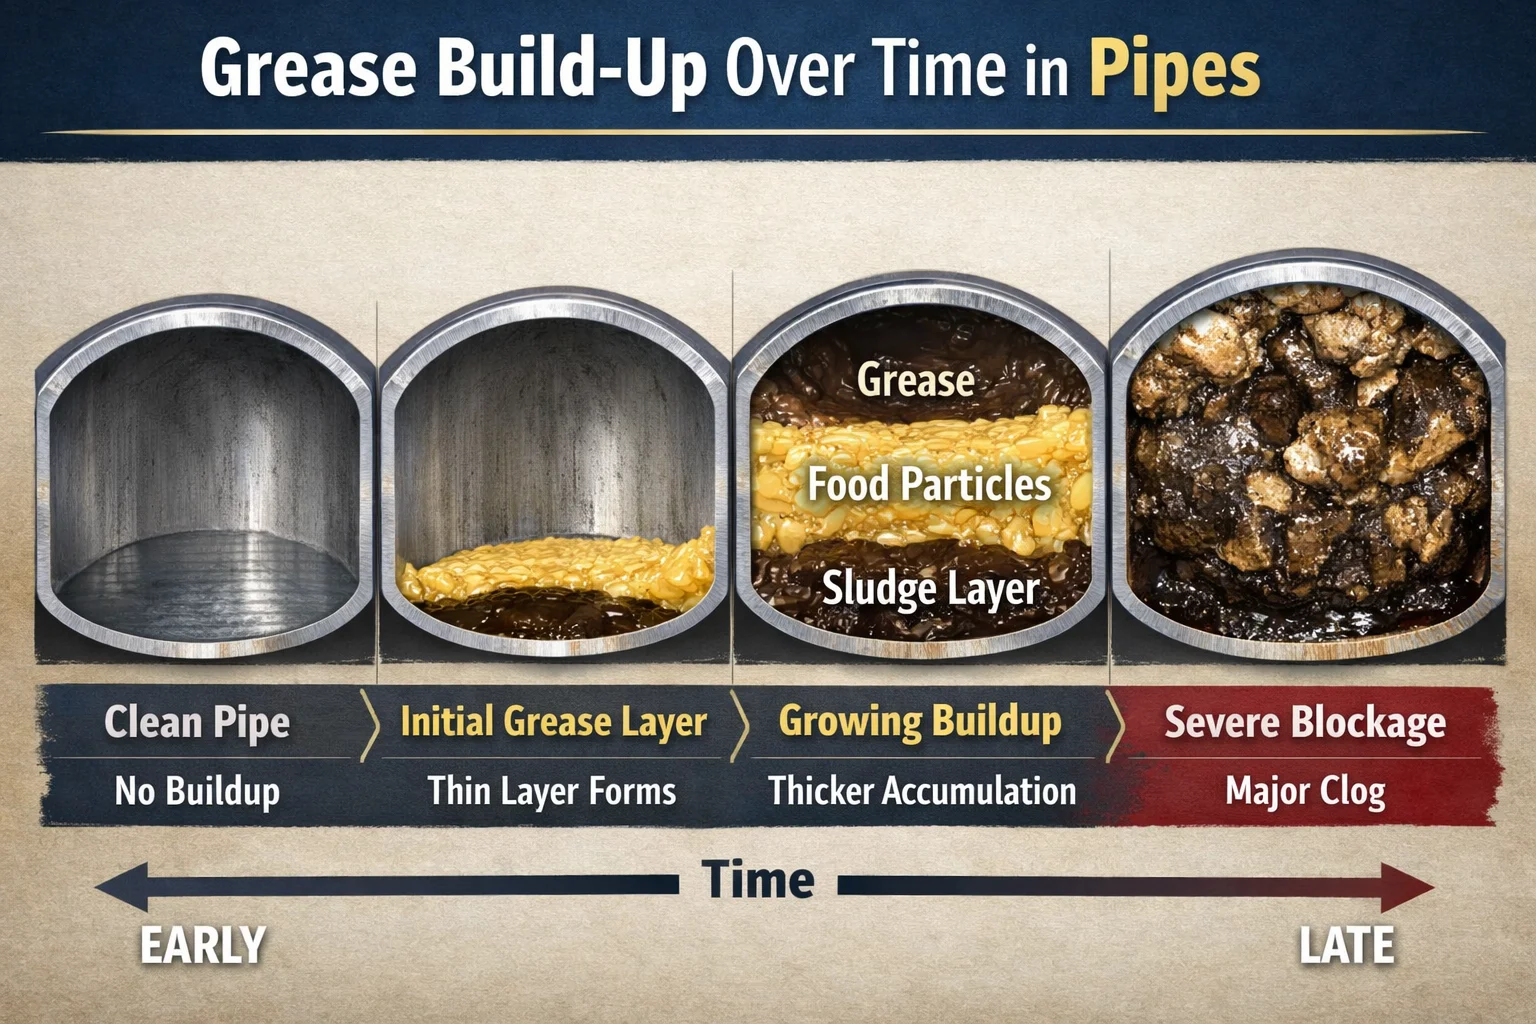
Cartridges wear down, and mineral buildup from Plano's hard water accelerates that process.
When the cartridge fails, common symptoms include:
- A handle that turns but produces no change in flow or temperature
- Constant dripping even when the shower is fully off
- Scalding or freezing water with no ability to regulate it
- Stiff or loose handle movement
Most single-handle showers use one cartridge. Two-handle showers have one for hot and one for cold.
What You Need Before You Start
Before touching the valve, confirm the brand and model of your shower fixture. Cartridges are brand-specific and sometimes model-specific. A Moen cartridge will not fit a Delta valve. Write down or photograph the brand name on the handle or trim plate before purchasing a replacement.
You will also need:
- Adjustable pliers or cartridge puller (some brands require a specific tool)
- Flathead and Phillips screwdrivers
- Replacement cartridge (match the exact model)
- Plumber's grease (silicone-based)
- A bucket or towels
How to Replace a Shower Cartridge: Step-by-Step
Cartridge replacement follows a straightforward sequence once you have the right part in hand. Read through all the steps before you start, so nothing catches you off guard mid-job.
Work through the steps in this order:
- Cover the drain with a towel – Cover the shower drain with a towel before you start unscrewing anything. Those tiny handle screws and retaining clips are magnetically attracted to open drains, and losing one turns a 20-minute job into a 4-hour nightmare.
- Shut off the water supply – Turn off the shower's dedicated shutoff valve, or shut off the main water supply to the house if no shutoff is present.
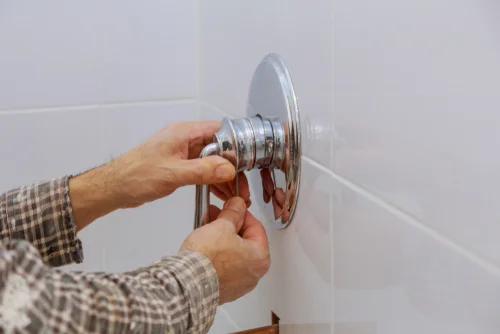
- Remove the handle – Pry off the decorative cap at the center of the handle to expose the screw. Remove the screw and pull the handle straight off.
- Remove the trim plate (escutcheon) – Unscrew the plate covering the wall opening to expose the valve body.
- Locate and remove the cartridge retaining clip – Most cartridges are held in place by a small clip or retaining nut at the top of the valve. Use needle-nose pliers to remove it carefully.
- Pull out the old cartridge – Grip the cartridge stem with pliers or a cartridge puller and pull it straight out. Note the orientation: the cartridge must go back in facing the same direction or the hot and cold will be reversed.
- Insert the new cartridge – Apply a thin layer of silicone grease to the cartridge body. Align it with the valve opening and push it in firmly until it seats.
- Reinstall the retaining clip – Secure the cartridge in place with the clip or retaining nut.
- Reassemble the trim and handle – Reattach the trim plate and handle, then tighten the screw and replace the decorative cap.
- Turn the water back on and test – Check for leaks at the valve and confirm the handle produces the expected range of temperature and flow.
If everything holds and the temperature responds normally, the job is done. If the pressure feels off or the handle still drips after testing, the valve body itself may need attention, and that is a good time to call our team before the problem gets worse.
When to Call a Plumber Instead of DIY
Cartridge replacement is manageable for a confident DIYer, but certain situations make professional service the better choice.
Consider calling a plumber if:
- You cannot identify the valve brand or find a matching cartridge
- The old cartridge is corroded and will not pull out cleanly
- Water continues to drip after replacement
- The valve body itself is cracked or shows signs of water damage behind the wall
At DNA Plumbing Heating and Air, our plumbers diagnose the issue before recommending any parts or work. If the cartridge is the problem, we replace it with the correct part and test the valve fully before leaving. If something larger is going on inside the wall, we explain what we find with upfront pricing so you can make an informed decision.
Contact us at (214) 817-3755 to schedule shower valve repair in Plano and the surrounding area. Our team provides transparent pricing on every job.